 Need help writing code? You can hire Robots + Big Data to write Arduino software for your project! Click here to get started...
The Arduino real-time loop stops advancing when you write delay() or use interrupts in your sketch. You can keep the real-time loop moving by using millis() to track time and create delay, but it's more complicated and soon becomes messy to manage.
This lightweight library manages time the same way you would by setting a waypoint and calculating elapsed millis(). It is a simple replacement to manage your timed events with english instead of math.
This library performs in Soft Real-Time, which means that it will mostly stay on time but is allowed to slip if performance is an issue. This could look like a microsecond of time loss when the timer expires but before it is restarted. Or this could look like a busy Arduino loop() where the timer resolution degrades to only fire an event within 25 microseconds of an actual event. (A microsecond is a small fraction of a millisecond).
There are other solutions for Hard Real-Time problems that require exact timing, which cannot slip for any reason. These are considerations when using this timer within a project, but for the most part; performance is awesome and you should use this library.
#include <RBD_Timer.h>

RBD::Timer timer;

void setup() {
  Serial.begin(115200);
  timer.setTimeout(3000);
  timer.restart();
}

void loop() {
  if(timer.onRestart()) {
    Serial.println("Three seconds passed");
  }
}
RBD::Timer
Create a new timer and pass in the [optional] timeout value (in milliseconds), which is the same as providing a value to setTimeout().
The timer has three states: active, expired, and stopped. The timer will begin in the expired state. Call restart() or onRestart() to start using it. The timer is not constructed in the stopped state because this disables the event-based methods of this library, such as starting a loop with onRestart().
RBD::Timer timer;
RBD::Timer timer2(200);

void setup() {
  timer.setTimeout(123);     // decide timeout at runtime
  // timer2.setTimeout(200); // already set
}
Provide an unsigned long greater than zero to change how long the timer will run (in milliseconds). This can be done in the constructor(), at setup(), or inside of the loop() to change the value at runtime. This will override any value given to setHertz().
void setup() {
  timer.setTimeout(200);  // expire after 200ms
  timer.restart();
}

void loop() {
  if(timer.isExpired()) {
    // returns true after 200ms
  }
}
Provide an integer from 1 - 1000 to set approximately how many times the timer will restart in one second. This can be done inside of setup() or also inside of loop() to change the value at runtime. This will override any value given to setTimeout().
void setup() {
  timer.setHertz(5);  // expire after 200ms
}

void loop() {
  if(timer.onRestart()) {
    // events fired here are close to 5Hz
  }
}
When first created; a timer will be expired. Restart the timer to begin using it. This method can be used with isExpired() to create a continuous loop.
Check out onRestart() to execute code at a specific interval.
void loop() {
  if(timer.isExpired()) {
    // run code here, then restart the timer
    timer.restart();
  }
}
Calling stop() kills all events and prohibits everything except isStopped() from returning true. You must call restart() to activate the timer again.
void loop() {
  if(timer.onExpired()) {
    timer.stop();
  }

  if(timer.isExpired()) {
    // code here will not execute when stopped
  }
}
Calling expire() will immediately expire the timer without changing the getTimeout() value. You must call restart() to activate the timer again.
void setup() {
  timer.expire();
}

void loop() {
  if(timer.onExpired()) {
    // code will run here immediately
  }
}
Returns the unsigned long value that was provided to setTimeout().
void setup() {
  timer.setTimeout(42);
}
void loop() {
  Serial.println(timer.getTimeout());
}
Returns the integer value that was provided to setHertz().
void setup() {
  timer.setHertz(10);
}

void loop() {
  Serial.println(timer.getHertz());
}
Returns an unsigned long of how many milliseconds that have passed since the start of the timer.
void loop() {
  Serial.println(timer.getValue());
}
Returns an integer from 0 - 100 of how much time has passed as a percentage of the total interval. If the timer has run for 500ms in a 2000ms timeout: this method will return 25.
void loop() {
  Serial.println(timer.getPercentValue());
}
Returns an unsigned long of how many milliseconds left until the end of the timer.
void loop() {
  Serial.println(timer.getInverseValue());
}
Returns an integer from 100 - 0 of the inverse of how much time has passed as a percentage of the total interval. If the timer has run for 500ms in a 2000ms timeout: this method will return 75.
void loop() {
  Serial.println(timer.getInversePercentValue());
}
Returns true if time is available. Use this method with getPercentValue() or getInversePercentValue() to perform real-time actions tweened over time.
Use onActive() to only fire a single event when the timer goes active.
void loop() {
  if(timer.isActive()) {
    Serial.println(timer.getPercentValue());
  }
}
Returns true if time has run out. This method can be used with restart() to create a continuous loop.
Check out onRestart() to execute code at a specific interval.
void loop() {
  if(timer.isExpired()) {
    // run code here and restart when finished
    timer.restart();
  }
}
Returns true after calling stop(). Returns false if the timer isActive() or isExpired().
void setup() {
  timer.stop();
}

void loop() {
  if(timer.isStopped()) {
    Serial.println("Timer Stopped");
  }
}
This method will fire a single event when the timer goes active. The timer must expire and then be restarted for this event to fire again.
void loop() {
  if(timer.onActive()) {
    // code only runs once per event
    Serial.println("Timer Active");
  }
}
This method will fire a single event when the timer expires. The timer must be restarted and then allowed to expire for this event to fire again.
void loop() {
  if(timer.onExpired()) {
    // code only runs once per event
    Serial.println("Timer Expired");
  }
}
This is a simple way of creating a loop instead of using isExpired() and restart() together. Use this to execute code at a specific interval.
This method will identify when the timer expires, restart the timer, then allow a block of code to execute. It then waits for the timer to expire to perform these actions again.
void loop() {
  if(timer.onRestart()) {
    // timer just expired, then restarted
    // code only runs once per restart
    Serial.println("Timer Restarted");
  }
}
Download and install the latest version of the ![]() Arduino IDE.
Arduino IDE.
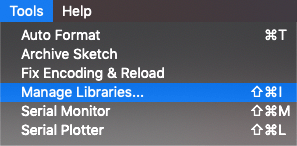
Open the Arduino IDE and click Tools ⇒ Manage Libraries...
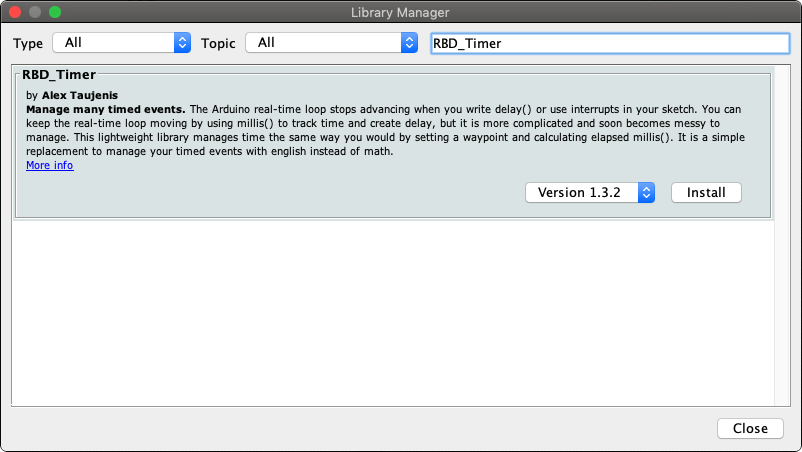
Search for RBD_Timer in the Arduino Library Manager and click Install, then click Close.
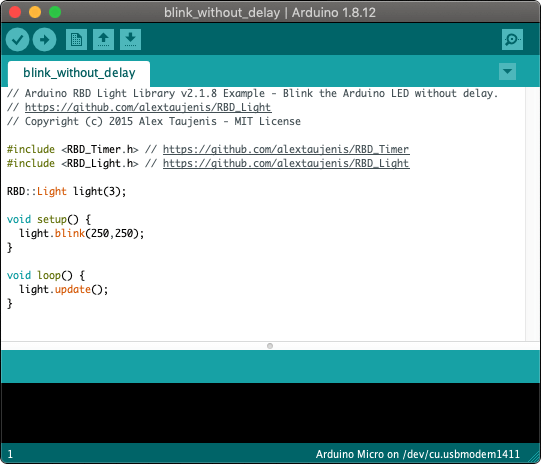
Click on File ⇒ Examples ⇒ RBD_Timer ⇒ example_name in the Arduino IDE to see code examples for this library, or create a new sketch in the Arduino IDE and copy the Example Sketch to get started.