 Need help writing code? You can hire Robots + Big Data to write Arduino software for your project! Click here to get started...
Control motors without delay with commands like on(), off(), forward(), reverse(), and ramp(). Fire custom events when the motor has reached the target speed with onTargetSpeed(), or when it has changed direction with the onForward() and onReverse() events.
Motors can be wired to move in a single direction, or can be driven in both directions with the help of a motor-shield or H bridge and this library. See the forward and reverse example included with installing this library.
This is a high powered motor driver circuit that can spin a single motor at variable speed in one direction. It is called a low-side switch that includes over-current and inductive kickback protection. The motor can be powered from batteries or a DC adapter. This circuit requires an Arduino PWM pin for variable speed control.
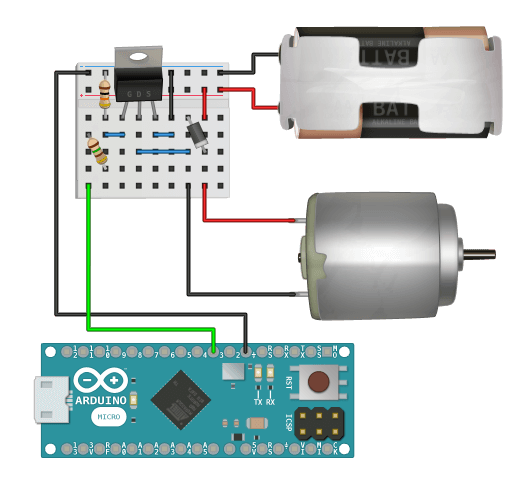
The Example Wiring circuit only spins the motor in one direction, but this library is capable of forward and reverse. To enable this capability you should use a motor shield or H bridge, then specify the [optional] forward and reverse pins in the constructor(). See the forward and reverse example included with installing this library.
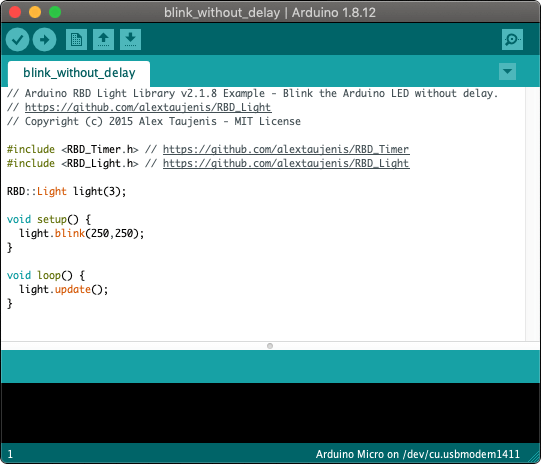
#include <RBD_Timer.h>
#include <RBD_Motor.h>

RBD::Motor motor(3); // PWM pin

void setup() {
  motor.rampUp(5000);
}

void loop() {
  motor.update();

  if(motor.onTargetSpeed()) {
    if(motor.isOn()) {
      motor.rampDown(3000);
    }
    else {
      motor.rampUp(5000);
    }
  }
}
You can use this library without calling update() and most methods will function correctly. You must continuously call update() inside of loop() in order to use theReal-Time methods tagged below.
RBD::Motor

Create a new motor and pass in the Arduino PWM pin number. The forward and reverse pins are [optional] and can be used to control the motor in both directions with the help of a motor shield or H bridge. The motor will be set forward() by default if you provide the forward and reverse pins.
RBD::Motor motor(3); // PWM pin

void setup() {
  ...
}
Start the motor at full speed.
void setup() {
  motor.on();
}
Stop the motor.
void setup() {
  motor.off();
}
Set the spin direction for the motor so that all new commands move it forward. The motor is set forward() by default.
You must provide the optional forward and reverse pins in the constructor() and correctly wire the motor to use this method. The motor should be spun to a full-stop before calling this method. This library will forcibly stop the motor before switching to the forward state.
void setup() {
  motor.forward();
  motor.rampUp(3000);
}
Set the spin direction for the motor so that all new commands move it in reverse.
You must provide the optional forward and reverse pins in the constructor() and correctly wire the motor to use this method. The motor should be spun to a full-stop before calling this method. This library will forcibly stop the motor before switching to the reverse state.
void setup() {
  motor.reverse();
  motor.rampUp(3000);
}
Flip the spin direction for the motor so that all new commands will move it in the opposite direction than they do currently. This alternates between forward() and reverse().
You must provide the optional forward and reverse pins in the constructor() and correctly wire the motor to use this method. The motor should be spun to a full-stop before calling this method. This library will forcibly stop the motor before toggling to the new state.
void loop() {
  if(...) {
    motor.toggleDirection();
    motor.rampUp(3000);
  }
}
Pass in an integer from 0 - 255 to control the speed of the motor.
void setup() {
  motor.setSpeed(85); // one-third speed
}
Pass in an integer from 0 - 100 to control the speed percentage of the motor. This is essentially the same as setSpeed() but with a smaller input scale.
void setup() {
  motor.setSpeedPercent(50); // half speed
}
Returns true if the motor is running at 100% speed.
void setup() {
  motor.on();
}

void loop() {
  if(motor.isOn()) {
    ...
  }
}
Returns true if the motor is running at 0% speed.
void setup() {
  motor.off();
}

void loop() {
  if(motor.isOff()) {
    ...
  }
}
Returns true if the motor is set in the forward() state.
You must provide the optional forward and reverse pins in the constructor() and correctly wire the motor to use this method.
void loop() {
  // motor set forward by default
  if(motor.isForward()) {
    ...
  }
}
Returns true if the motor is set in the reverse() state.
You must provide the optional forward and reverse pins in the constructor() and correctly wire the motor to use this method.
void setup() {
  motor.reverse();
}

void loop() {
  if(motor.isReverse()) {
    ...
  }
}
Returns an integer from 0 - 255 for the current motor speed.
void setup() {
  motor.setSpeed(123);
}

void loop() {
  Serial.println(motor.getSpeed());
}
Returns an integer from 0 - 100 for the current motor speed percentage.
void setup() {
  motor.setSpeedPercent(45);
}

void loop() {
  Serial.println(motor.getSpeedPercent());
}
Keep the real-time functions processing with each loop(). This must be called continuously within loop() in order to use any real-time methods.
void loop() {
  motor.update();
}
Start the motor at full speed and turn it off after the specified time in milliseconds.
void setup() {
  motor.timedOn(5000);
}

void loop() {
  motor.update();
}
Pass in a timeout in milliseconds for how long it will take to ramp from the current speed to full speed with a linear transition.
void setup() {
  motor.rampUp(3000);
}

void loop() {
  motor.update();
}
Pass in a timeout in milliseconds for how long it will take to ramp from the current speed to full stop with a linear transition.
void setup() {
  motor.on();
  motor.rampDown(4000);
}

void loop() {
  motor.update();
}
Pass in a value from 0 - 255 to set the target speed of the motor, and a timeout in milliseconds for how long it will take to ramp from the current speed to the target speed with a linear transition.
void setup() {
  motor.ramp(85, 2000); // one-third speed in 2 seconds
}

void loop() {
  motor.update();
}
Pass in a value from 0 - 100 to set the target speed percent of the motor, and a timeout in milliseconds for how long it will take to ramp from the current speed to the target speed percent with a linear transition. This is essentially the same as ramp() but with a smaller input scale.
void setup() {
  motor.rampPercent(50, 1000); // half speed in 1 second
}

void loop() {
  motor.update();
}
This method will return true once the motor starts moving forward(). This method will then return false until the motor has stopped, moved in reverse, then started moving forward again.
You must provide the optional forward and reverse pins in the constructor() and correctly wire the motor to use this method.
void setup() {
  motor.rampUp(5000);
}

void loop() {
  motor.update();

  if(motor.onForward()) {
    // code only runs once per event
    Serial.println("Moving Forward");
  }
}
This method will return true once the motor starts moving in reverse(). This method will then return false until the motor has stopped, moved forward, then started moving in reverse again.
You must provide the optional forward and reverse pins in the constructor() and correctly wire the motor to use this method.
void setup() {
  motor.reverse();
  motor.rampUp(5000);
}

void loop() {
  motor.update();

  if(motor.onReverse()) {
    // code only runs once per event
    Serial.println("Moving in Reverse");
  }
}
This method will return true once the motor hits the target speed set in any of the real-time methods. This method will then return false until a new target speed is set (with a real-time method) and then achieved again by the motor.
void setup() {
  motor.off();
  motor.rampPercent(50, 5000);
}

void loop() {
  motor.update();

  if(motor.onTargetSpeed()) {
    // code only runs once per event
    Serial.println("Target Speed");
  }
}
Download and install the latest version of the ![]() Arduino IDE.
Arduino IDE.
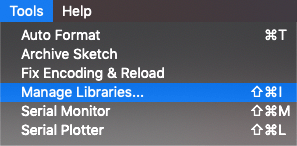
Open the Arduino IDE and click Tools ⇒ Manage Libraries...
Search for RBD_Motor in the Arduino Library Manager and click Install.
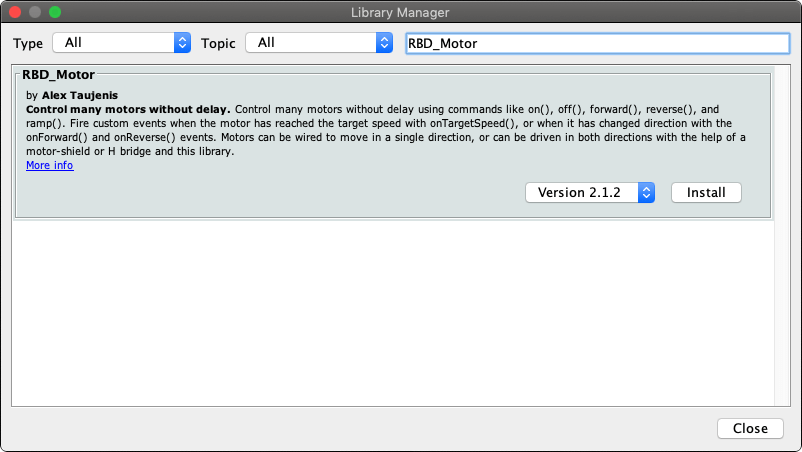
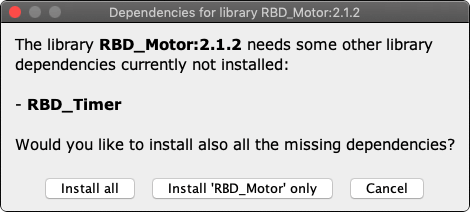
Click Install all to install additional dependencies for this library, then click Close.
Click on File ⇒ Examples ⇒ RBD_Motor ⇒ example_name in the Arduino IDE to see code examples for this library, or create a new sketch in the Arduino IDE and copy the Example Sketch to get started.